Congratulations!
You’ve just got your NUC of bees! It’s going to be a fun and exciting journey for you, whether you’re a new beekeeper or seasoned pro.
Nuc Transfer Video with Jennifer
https://drive.google.com/file/d/16ABefD_wc57JOgOL3l1TWhVCHkCax4N_/view
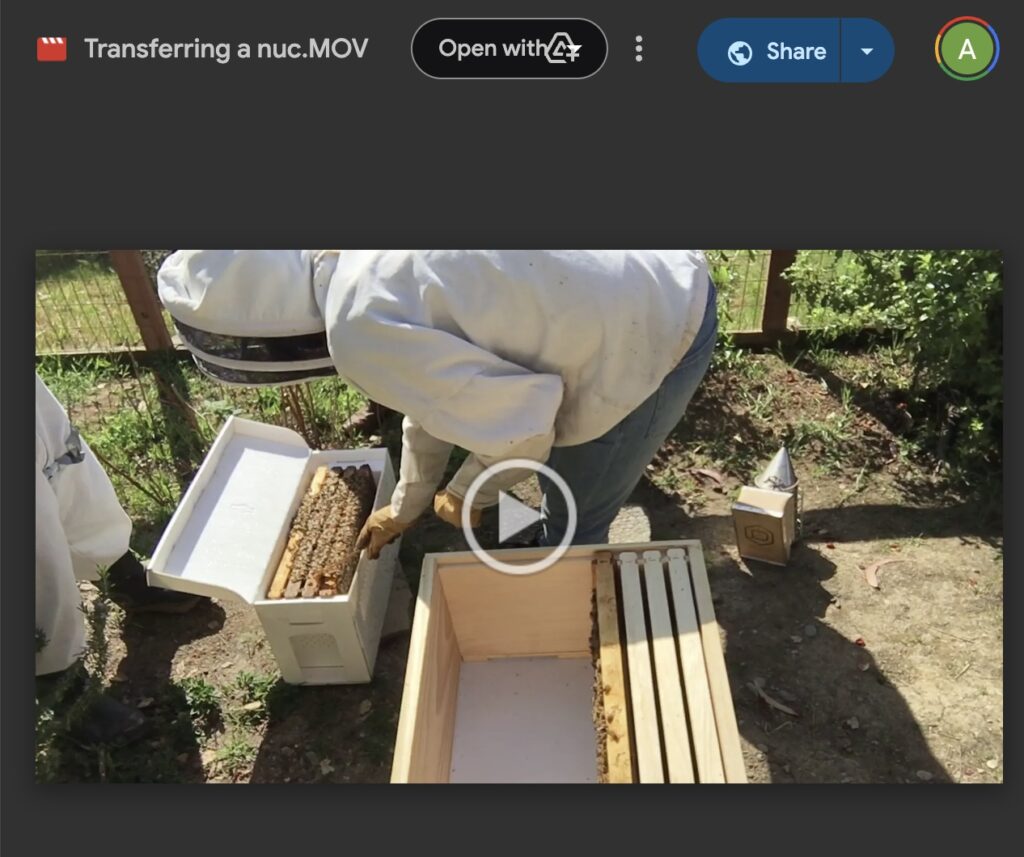
Below, you’ll find information on caring for your new hive immediately after receiving it.
In addition we recommend the following 4 classes for taking care of your bees:
- Backyard Beekeeping – Learn the basics of beekeeping and getting bees.
- Hive Inspection Class – Learn the tools, inspection goals, & how to keep the bee calm!
- Varroa Mite Management – Learn how to keep your bees healthy & survive multiple years!
- Taking Care of Your Nuc – This class is an overview of taking care of your nuc the first year.
They are extremely informative and a great opportunity to ask questions directly of a local beekeeper!
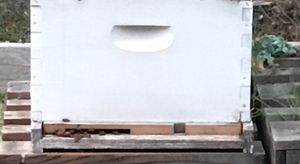
Entrance Reducers or Robbing Screens
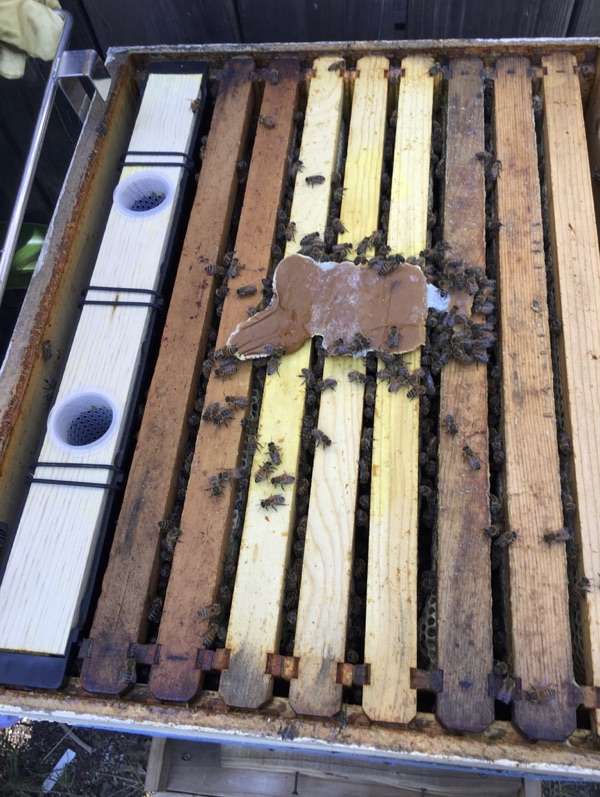
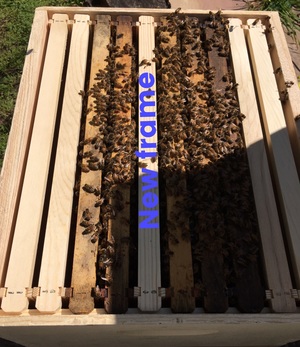
In the Bay Area, robbing from beehives is common, even in the spring when there is plenty of food. Robbing is when bees from other hives try to get into your hive and steal honey or sugar water. To help prevent this, we recommend putting an entrance reducer on your hive immediately; the entrance reducer will give your bees a smaller entrance to defend, therefore reducing robbing! There are two options on an entrance reducer, 4.5″ opening or 1″ opening. We recommend using the 4.5″ opening, as in the photo above. Entrance reducers can be put on during the day – simply gently push the bees out of the way and insert slowly.
Additionally, we also recommend putting on a robbing screen in July and keeping it on through the fall. Robbing screens need to be put on at night, so the bees can reorient to it the next day. Robbing screens are covered in our Varroa Mite Management class.
Feeding Your Bees
If you’ve already had bees and have drawn out comb, you do not need to feed your bees.
If you are a new beekeeper and/or the bees will be getting new frames, we recommend you feed your bees at least for the first 2 weeks. To really help them build out all the wax on the frames, we recommend you feed them up to when you add the 3rd box. This will likely be the first 4-6 weeks.
We found a few years ago that people who fed their NUC in the first month had hives that were one box bigger than people that hadn’t fed. Feeding them sugar water helps them make the beeswax more quickly for your new frames, enabling the queen to start laying faster in the new beeswax honeycomb, increasing your population earlier.
What To Feed
You feed sugar water to the bees in a 1:1 ratio. Heat up 4 cups of water without boiling, and dissolve 4 cups of sugar into it. Cool off and insert into a feeder.
Making greater quantities and keeping the extra in the fridge is common. If you have other hives with honeyframes, you can also give them honey frames instead. However, it’s really nectar the bees need (not honey) to stimulate the bees to produce beeswax. Sugar water approximates nectar.
NO ORGANIC SUGAR: organic sugar is less processed than conventional white sugar and gives the bees dysentery (brown streaks of poop across the front of your hive). Only use the conventional white sugar. You may want to use the sugar cane sugar as the beet sugar is usually GMO.
How To Feed
There are 2 different ways to feed your bees:
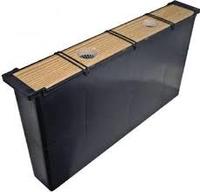
Entrance Feeder
The first option is an Entrance Feeder with a mason jar attached.
However, we recommend NOT putting the feeder at the entrance. Instead, it’s best to put the entrance feeder INSIDE your hive.
–Remove the outer cover.
–Place the assembled and filled entrance feeder on top of your inner cover.
–Put an empty medium super box on top and then your outer cover on top of the super box. This will encase the feeder inside your hive, so bees from other hives can’t rob it. The inner cover will keep the bees from moving up.
Frame Feeder
Frame Feeders are also a great option. They also prevent robbing as they are completely within the hive. They hold a lot more sugar water than the entrance feeders, needing fill up only once per week, rather than every 1-2 days.
However, this will replace 1-2 frames in your hives. Replace 1-2 outside frames by putting the feeder on the edge of the box.
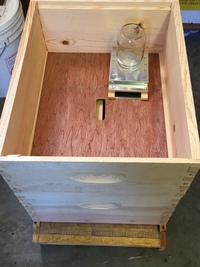
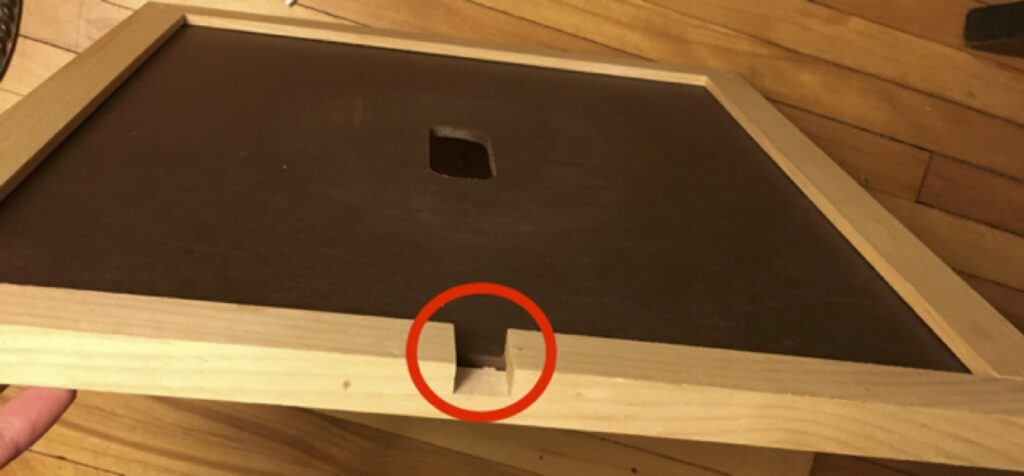
Close Up Gap in Your Inner Cover
Inspect your inner cover and see if it has a gap in it where bees can get through (circled in red below). This is meant to be an optional upper entrance. Put heavy tape over that gap to close it up. If bees are getting in and out of your cover, there is a high chance of robbing through that gap. You only want an entrance at the bottom of the hive that will help the hive defend itself easily.
Provide Water for Your Bees!
It’s important to provide a water source for your bees so they don’t go to your neighbor’s hot tub, bird bath, etc. It’s usually in the winter time or on hot sunny days that the bees will be foraging for water significantly. However, you want them to have discovered the water source in your yard as their preferred source, so on those days they really need it, the bee activity will be at your source in your yard. If they are frequenting something in your neighbor’s yard, put a water source between your hives and that source and entice them there. Being efficient, they should prefer the closer source. Here are tips on how to provide water sources for bees:
- Shallow water
Deep water will make bees drown. They like very shallow water with things they can stand on and easily get to the water. Some common things to use are: 1) a bird bath with gravel and rocks in it. 2) a container with floating corks in it or 3) a shallow tray with gravel/rocks in it - Put water in a sunny place.
It’s cool here and bees don’t often go in the shade. - Bees like murky water (more nutrients), so no need to keep it clean or constantly change it.
- Mix a little bit of oyster shells (if you have chickens, you’ll have these) in the water in the beginning to entice the bees to it. You can also just put a little salt in the water. They like salty water. After they find the source, you don’t have to keep making it salty. You can also put a little chlorine bleach in the water when you first put out to entice them (yes, bees love chlorine pools for water sources).
- Put out 2-3 water sources at the beginning and see which 1-2 they find/prefer.
Inspect Your Hive Weekly in the Beginning
We recommend inspecting your hive every week for the first month or two. Along with keeping an eye on the progress of your hive, its good to practice inspecting when the hive is small and less intimidating. In general, we recommend inspecting every two weeks from February to October to keep your hive healthy. For more information on inspecting, take our Hive Inspection class.
Add a Box
Generally, if the bees have built out the honeycomb on 7 or 8 frames in your Deep box, then it’s time to add a box on top. With Randy Oliver’s bees, we see that this usually happens in 2-3 weeks. Optionally, if they haven’t moved outward, see below for adding a frame in the middle.
When adding an additional box with new frames, we recommend supplementing with sugar water for at least 1 week to get them to build out the honeycomb in the frames faster. They need lots of food to make beeswax!
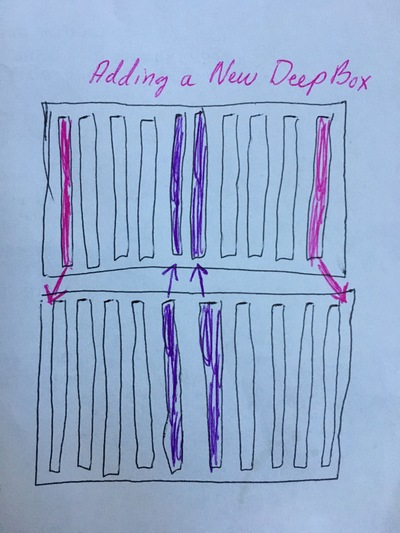
Adding a Deep Super Box
If you are adding Medium Super Box, there are no special steps, as it has a different size of frames; simply stack it on top!
If you are adding an additional Deep Super Box (same size as your bottom box), we recommend moving two existing frames up into the new box. Then push all the frames together in the bottom box and put in the two remaining frames on the outside. Often times the bees won’t go up into a new box; this trick gives them encouragement to do just that. Moving the frame feeder up into the top box will also encourage the bees to go up.
Inserting a Frame into the Middle
If the bees haven’t moved out to the outer edges of your original box, we recommend putting a new frame in the middle of the NUC frames. This can also be helpful in the first week of getting your NUC, for example when you transfer the bees from the NUC box into wooden hive equipment.
The new middle frame can be either a brand new frame with new foundation or it could be an already drawn out frame that the queen can start to lay in right away. This will give them more space and prevent them from swarming.
This trick can be repeated multiple times, it will likely get your frames drawn out faster and give your queen new space to lay. Bees prefer to build beeswax in the middle of the box and rarely do it on outside frames.
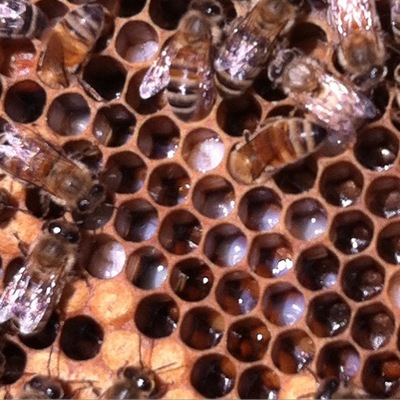
Look for Larvae!
White larva look like little white worms. This means you have had a queen laying in the past 10 days. The larva can be big and curled up in the honeycomb, or smaller and may have white milky liquid around them. Practice your inspecting: Can you spot the two stages in the photo above?
Tip: If you have a frame with capped brood in the center, look around the edges. There will likely be larva there. The queen lays in the center of a frame first, so those brood are older (capped) and the outer brood will be younger (uncapped).
If you see larva, then that means the queen survived the journey from Grass Valley to your location. If you don’t see larva, make sure you’ve really looked at every frame and moved bees aside to look. Then, report it to us. It’s helpful if you take high quality photos of the frames and send them through email.
QUEEN FAILURE OR NUC PROBLEMS – Report within 3 weeks!
If for some reason your queen fails, please let us know ASAP. If you have any problems with your nuc, you need to report it within 3 weeks of getting your nuc. We will then do our best to correct the problem.
What is the Plastic Bell-Shaped Thing?
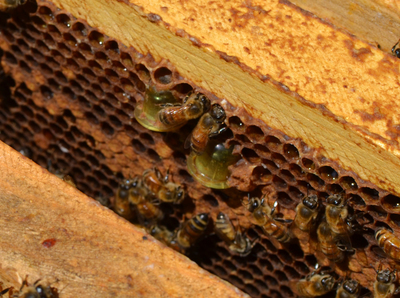
They are plastic queen cups that were used in queen rearing. The beekeeper chooses particular queens to breed each year that do well against varroa mites. The new queens are started in plastic queen cups so they can be easily transported. When the queen cell is capped, one is then put into each NUC – the plastic cup is easy to press into the wax comb. The queen hatches out, goes out to mate over 1-2 weeks, and starts laying. You may have more than one plastic cup because it’s there from past years or the queen didn’t mate the first time, and they had to add a second queen cell and repeat the process.
The short story is that you can pry them out with your hive tool and remove them.
We hope you enjoy your bees, care for them well, & that they thrive!!!!